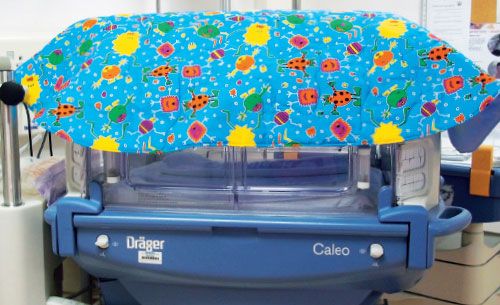
Incubator covers are designed to protect the baby from the bright hospital lights and to create a homely atmosphere. There are two different patterns below, based on the requirements of hospitals in different areas. Please check with your local Linus coordinator about which is best in your area before sewing.
Pattern One
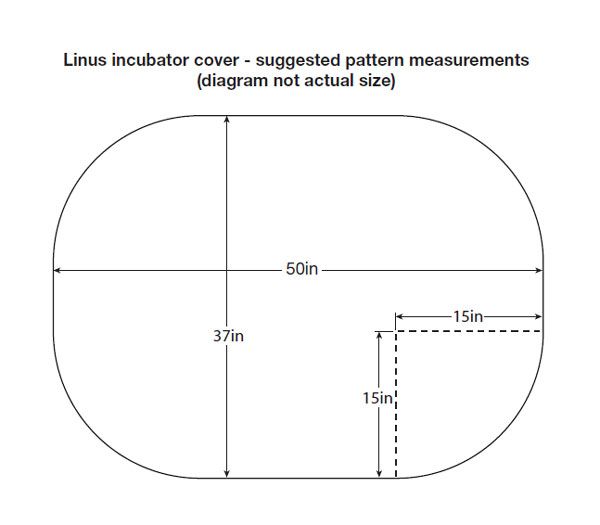
This pattern is used for the Royal Worcester Neo-Natal Unit, and is kindly provided by local coordinator Lynne Adams.

The incubator cover is essentially a roundcornered rectangle measuring approx 94 x 127cm (37 x 50in). A quarter-circle template with a radius of approx 38cm (15in) is ideal for rounding the corners.
The covers must be machine washable up to 60 degrees, so cotton fabrics are ideal. Any colour is fine, but please don’t use plain white fabric as a backing because it reflects the light which can be quite harsh. Polyester wadding can be used; quilting thread should be cotton or polyester. The quilting should not be too dense. As the corners are rounded, you will need to use bias binding.
If you are short of time, or don’t wish to bind your cover before quilting it, you can use the ‘bagging out’ or ‘pillowcase’ method to finish the quilt edges. If you wish to use the ‘bagging out’ or ‘pillowcase’ method instead of binding your quilt, the rectangles need to be cut 38 x 51in to provide a 1⁄2in seam allowance. With the cover top and back right sides together, place the wadding on top of wrong side of the cover top. Pin to secure and then stitch all round leaving a gap of approx 12in.
Remove the pins and turn the quilt through to the right side. Turn the raw edges of the gap under and slipstitch closed, or topstitch the gap closed approx 1⁄8in from the edge. Then quilt the cover.
Pattern Two
This pattern is used in Birmingham and the West Midlands, and was kindly provided by local coordinator Joy Edgington.
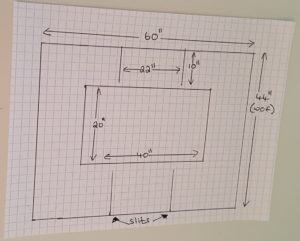
Quilt Top: 60” x 44” child friendly cotton print fabric
Quilt wadding: 40” x 20”
Quilt back: 60” x 44” white/cream cotton fabric or sheeting

To Make
Assemble layers. The quilted area sits on top of the incubator, so the wadding goes in the centre with 10” either end of the long side and 12” either side on the width. You can quilt this top area as you like and also the sides, avoiding the slits.
Please note that there are slits required on either side of the cover for observation purposes. There are 4 slits each 10 “ long and 9” from the end of the wadding. The centre 22” of each side can thus be lifted up, allowing the nurse a clear view of the baby.
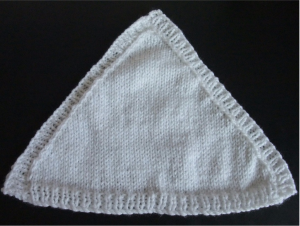
 These are small knitted triangles that the mother rubs on her body and this triangle is then placed with the premature baby. This gives the baby the scent of the mother.

